Here's an update on what's going on in my lanai gardening...
After working many years in the Waikiki hotel business, I have learned that not everyone knows what a "lanai" is. I guess it depends on where you are from if you are familiar with the word or not. We here in Hawaii commonly refer to lanais as a lanai where others may call them balconies or verandas.
Anyway, with that out of the way, gardening on a lanai has been a challenge for me. I have always grown things in regular gardens because I grew up in a regular house. These past several years, I have been experimenting with options available to have an efficient and visibly pleasing garden on my lanai.
|  This is one of my latest experiments to add to my lanai. I thought of this after seeing one of those infomercials selling what is called a "Topsy Turvy". (I don't want to post a photo of it here, but I'm sure you can find it if you Google it.) If you don't know what it is, it's an unattractive hanging green tube that allows you to grow a tomato plant out of the bottom. (Just Google it if you don't understand.) This is one of my latest experiments to add to my lanai. I thought of this after seeing one of those infomercials selling what is called a "Topsy Turvy". (I don't want to post a photo of it here, but I'm sure you can find it if you Google it.) If you don't know what it is, it's an unattractive hanging green tube that allows you to grow a tomato plant out of the bottom. (Just Google it if you don't understand.)
I didn't want to have that unattractive thing hanging on my lanai because not only would it be something I would see, it's also something the neighboring buildings would have to see. I decided to pick up a coconut fiber hanging basket from Target (which recently opened in Honolulu) for about $8.
Then I started some tomato seeds in a tall cup of soil until it grew to about an inch in size. The height of the cup actually was the same height of the dome of the coconut basket if turned upside-down. I used a "venti" size plastic cup from a giant coffee producer.
When the seedling reached about an inch high, I made a hole in the coconut fiber with my finger in the center of the domed area. With the hole large enough to fit the tomato seedling through it without damaging the seedling, I carefully placed the upside-down coconut fiber basket over the cup with the seedling in it. I made sure the seedling peered through the hole in the coconut fibers. Next, I let it grow under the grow lights for about another month. It grew to about 2-3 inches; the size it shows in these photos.
|  Yesterday, I decided it was time to turn my coconut basket "right-side-up" which would make my tomato hang out of the bottom. I took this photo because I was amazed that after only 1 day of hanging upside-down, the tomato plant seems to have turned itself to face upwards again. Very quickly! Yesterday, I decided it was time to turn my coconut basket "right-side-up" which would make my tomato hang out of the bottom. I took this photo because I was amazed that after only 1 day of hanging upside-down, the tomato plant seems to have turned itself to face upwards again. Very quickly!
|  On the top side of the basket I planted some basil, cilantro and oregano. I planted the basil because I read a book one day while I was in Barnes and Nobles that said it was good to plant basil plants with tomato plants. I don't remember the name of the book now, but I'm sure I'll find it again. On the top side of the basket I planted some basil, cilantro and oregano. I planted the basil because I read a book one day while I was in Barnes and Nobles that said it was good to plant basil plants with tomato plants. I don't remember the name of the book now, but I'm sure I'll find it again.
|  I also bought this window planter box from Target and started some salad mix seeds and more basil in it a couple months ago. I also bought this window planter box from Target and started some salad mix seeds and more basil in it a couple months ago.
|
|


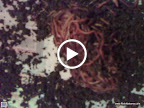
 There is a local business woman who has been specializing in providing these compost worms and worm bin kits for several years. Her business is called
  -A 1/4 pound of EPIGEIC Perionyx excavatus, a.k.a. Hawaii's native composting worms.


 We started with the 1/4 pound because it's suggested that they will be able to keep up with 2 adults average weekly food waste that can be added to the bin. The suggested consumption amount is 2 pounds of fruit, vegetable or grain waste per week.