A couple days ago, @S4xton drove me around the block in a Tesla that he had. This was my first experience in a fully electric street vehicle and it just so happened to be a Tesla. How will I ever be satisfied when I finally decide to get a Nissan Leaf? Hehehe.
Anyway, the torque was nice. I was a little weird-ed out by the silent acceleration that this vehicle is capable of. While I may be used to feeling the type of power and acceleration that this car offer (it's been a while since I've been planted back in my seat while someone drove me around the block) it was sort of scary not hearing the roar of 400 horsepower blowing out of an 80mm exhaust pipe. I guess I was concerned the other cars wouldn't hear us coming.
It was a great ride and I enjoyed it. Even considering the majority of the time we were sitting in bumper to bumper traffic in the hot sun.
Here is a little video that I took. It's not much, but it's what I got.
A few other friends also got to ride in the Tesla.
After I closed up my open house yesterday that was in Upper Makakilo, I went down to visit my friends' home in Kapolei. I visited to help tune their DeLonghi Magnifica that I gave them last year for their new home.
They made an attempt to figure it out, but for some reason the display was in another language so they didn't get very far. Anyway, as soon as it was plugged in when I was there it magically returned to display the universal language, English. Made my job quite simple! :)
The house call espresso machine tuning didn't come without payment. I was compensated with a slice of delicious home baked Apple Bread! I brought it home and Kelli & I ate it up early this morning for breakfast. It was delicious & was extremely well paired with my Rwanda Roast Americano!
Thanks for the treat "N"! =)
Sent via Nexus One mobile. Rick Nakama R GRI 808-382-6761
I anxiously waited the longly anticipated and rumored sales release date of the HTC Google Nexus One Android 2.1 phone. I first began reading about rumors of this phone coming out in late October and early November. It was torture waiting up to the rumored release date of January 5th to find out if it was really going to happen or not. I monitored the live blogs of people that were attending the special Google Android Press Release and within minutes of one blogger announcing the Google.com/phone link becoming active I placed my order! It was so exhilarating that it reminded me of the days I used to day trade over an unstable dial-up modem while watching CNN at 430AM!
The plain cardboard box arrived overnight by the next afternoon. Just a little over 30 hours after I ordered it. Thank goodness it didn't come by 2 day air. The wait would have been intolerable!
In a short description, I am really enjoying this phone. It works great overall.
If you haven't already guessed, I returned the TomTom GPS as well as the Garmin unit. The Google Navigation on this phone out performs both of them with much better accuracy.
I have had a few bugs that were resolved by powering off the phone and turning it back on. 1 strange issue is when I tried to make a call I could not hear anything and the person I was calling also could not hear anything. That was resolved by restarting the phone. I'm not sure what caused that. There are a few other strange things that others have reported and hopefully they resolve them with the firmware update.
The phone does have a 5.0 Megapixel camera with led flash. This is one feature that is not up to par with my Nokia N82. The photos are as good. I'll post some up later or look at some of my recent Twitpics to see how they are. It's decent, but just not quite as good. Maybe this can be corrected with software update also. I don't think so. I still love this phone.
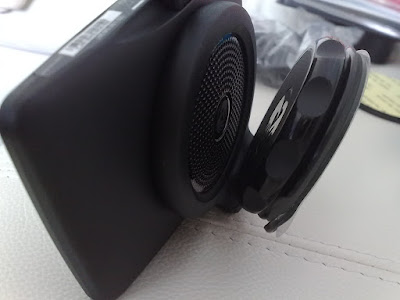
The first thing I noticed that I prefer on the TomTom (other than the door buster price of $99?) is the suction cup mount. It has a much lower profile than the Garmin. This makes it less bulky or obtrusive when mounted on the windshield. Other than that, these are some things I felt I either prefered or did not like compared to the Garmin:
- When connected the TomTom to PC via usb, it automatically downloads updated maps. The TomTom also does not let the unit operate while being charged via PC usb which I don't understand why. - This TomTom does not come with a carrying case like the Garmin did. - The traffic adapter looks like a better design, but for about $60 and no traffic service in Honolulu, Hawaii I will not be buying one. It does not come with the TomTom unit. - This TomTom has no Bluetooth, but I knew that which is why I wanted to test the Garmin prior to opening this one up. - This TomTom has "lane guidance". - The brand name "TomTom" sounds cooler than "Garmin". Haha =P - It comes with a normal length usb connector while the Garmin came with a super short 12 inch one which was silly. - It doesn't keep the display on when plugged in to usb PC for charging. The Garmin display was always on if plugged in which doesn't make sense since you can't operate the unit while it's plugged in anyway. (just wanted to point that out again.) - The usb connector port on the TomTom is centered on the bottom and the Garmin's was offset protruding out of the back making it seem more obtrusive especially if not using the mount it cant lay flat. - The TomTom's POI (Point of Interest) interface is much better than the Garmin's. It allows the POI's to be layered on the map. You can also select what types of POI's you want to be layered on your maps. - The TomTom doesn't appear to have any pin code security feature like the Garmin unit. Although I don't think it matters much if the thief is able to steal my GPS unit they might as well be able to use it. It's not like if they already stole it I'll feel much better knowing that they won't be able to use it while I'll already be stuck with car lock repairs or broken window repairs anyway. The only thing is they would know how to immediately drive to my "home" if it's set up. That would only make it a little easier for them to find it since your home address is normally on the vehicle registration paper which is normally also in your car anyway. So I don't think it matters much. Unless you are trying to keep the records of where you are driving to a secret from other household members that could get access to your GPS unit. -
Hopefully I'll be posting yet another GPS unit (sort of) review in another week or so. This will be on the highly anticipated arrival of the Google Nexus One Phone. Of course it will be no comparison as far as price, but I'm sure I'll enjoy the Google Maps navigation & searching features over these stand alone GPS unit's. Not to mention I will be able to use the handsfree speaker phone which is presumably going to integrate flawlessly into the device unlike the Garmin Bluetooth connection.
**Update** I'm expecting my Google Nexus One Phone to arrive today! Hurry up FedEx! I'm thinking I won't even need a stand alone GPS navigational device. Maybe I'll sell it since it was a door buster price or I'll just return it to Target. Stay tuned for my Google Nexus One Phone impressions!
This Christmas, Santa presented us with a TomTom XL 340s. One of Santa's Elves was able to purchase it from Target on Black Friday for the $99 door buster price. I haven't opened it yet. That's why this is a review about the Garmin nuvi 365 wt.
I decided to head to Costco to purchase the Garmin nuvi 365 wt for $169+ tax because I was really interested in having a GPS navigation device that supported Bluetooth handsfree calls since the city of Honolulu is a "handsfree driving city". Some of you may wonder, "Why do you even need a GPS having been born & raised in Honolulu & driving for almost 20 years???" Realisticly, the only time I do have the desire to use a GPS navigational device is when I'm looking for houses that are new listings. It's very helpful to find small streets in neighborhoods rarely visited.
Well, to cut straight to the point, I'm heading back to Costco to return the Garmin nuvi 365 wt. (I really appreciate Costco's no-hassle return policies.) The reasons that I am returning it are because I am not satisfied with:
- The lifetime traffic service that it comes with does not seem to even be available in Honolulu, Hawaii (a city that just received the ranking of worst rush hour traffic beating LA!). *update* just received email reply from Garmin Support stating that Honolulu, Hawaii is covered. Doesn't matter since I can't get it to work!!! & for the reason below this. - For the unit to receive traffic service the power cord/traffic receiver needs to be plugged into the unit and connected to power. This is annoying because the cord will be hanging down from your window or dash area to the cigarette lighter. It's very distracting. - The GPS receiver appears to be rather weak. The unit needs to be mounted on the top of the dashboard with the permanent sticker thing or on the actual windshield with the suction cup mount to receive the GPS signal. These locations block the view of the road and I don't think it's safe. I wanted to have the unit lower on the center console. This could be resolved by an external antenna, but I don't think it should be necessary since a cheaper TomTom unit I've used was able to receive signal without problems sitting on the passenger seat. - The Bluetooth handsfree works, but... when the Bluetooth makes the connection, there is some sort of glitch on the device that causes the volume of the unit to drop making the navigational direction too low to hear. You are able to correct this by going back to the volume setting where you will notice it already is at "100%" then exiting out. Doing this will bring the volume truly back to 100%. Honolulu being a handsfree city makes this process rather annoying to do evertime you get back into the car. *A side note, my phone is a Nokia N82 & is not on the official supported devices list.* Otherwise, the Bluetooth handfree works fine. - This unit doesn't provide lane guidance. Using the unit for the past 3 days around town to see how it tells me to get to places that I know how to get to has made me decide that this would not be effective if I was in a city that I was unfamiliar with because it doesn't let me know what lane I should be in on multi-lane roads. - The voice directions are too delayed. By the time it announces, eg: "turn left on Kuamoo Street", I would have already been turned onto Kuamoo Street. This is while at a full stop prior to turning left and not like I'm traveling at 50mph or something. - The unit comes with a short usb connector to charge the unit or transfer data to your PC. It's a great way to charge the unit if you're not in the car, but while it's plugged into the usb, the unit is not functional. This prevents you from having it connected to your usb/PC and punching in your desires at the same time. This is rather silly. - It also seems to recalculate the routes unnecessarily. This is probably because the GPS receiver has such poor reception.
Those are my reasons why I'm not keeping the Garmin nuvi 365 wt. I'm going to open up the TomTom XL 340s and see how I like that one even though it doesn't have Bluetooth handsfree. For the price, it's a great bargain. Besides, I'm anxiously waiting for the Google Nexus One Phone to be released and that's expected to be next week! If I have that phone, I probably wouldn't even need a GPS unit and shouldn't need the GPS unit with Bluetooth either. =) I can't wait, I'm so excited!! Sorry Nokia N82, you take great photos and do very well for almost everything, but you are a little behind the times already. I just hope I'm satisfied with the Google Nexus One Phone's photos!
As a Christmas present to our household, I decided to purchase and set up a multi-channel DVR system. I record so many tv shows and I'm behind about a year right now. I had 3 DVD recorders that I used to record up to 3 channels of tv shows at once. Back in the VHS days there was a time when I had 4 VHS VCRs set up to record. I converted to DVD-R about 3 years ago and now it's time to go DVR.
I was considering the Tivo route. I was ready to purchase 2 of the non-HD 2 channel Tivos until I discovered that the Tivo will not function at all if you do not subscribe to the Tivo service! I did not want to subscribe to the Tivo service. Absolutely not. It's a rip-off. This information lead me back to my original plans of using a PC to handle my digital recordings.
Anyway, I went to Best Buy to buy all the stuff because I'm from the instant gratification generation. I can't wait 2-3 business days for something to be delivered to me in the middle of the Pacific Ocean.
I spent about $1150 on a 8GB AMD Processor HP that has a 1TB Hard-drive, an HDMI Cable and 2 Hauppage WinTV HVR 2250 dual tuner cards w/ remotes. I looked for the 2250 on Hauppage.com, but only found 2200 <-Link which seems to be similar or the same thing.
The installation of the cards was simple. Actually, this is just an assumption because my IT friend, Abe <-FB Link installed the cards. He was going to set up the whole thing, but realized he couldn't do much w/out having a cable tv signal. So I brought it home to finish setting up the WinTV software.
My main concern was how the software would "figure out" which tuner I wanted to use because I was installing 2 of the 2 channel tuner cards into 1 PC. After playing around with it for several hours, I was still trying to figure out how to tell the software which tuner I was trying to program. I finally figured out that I didn't need to tell it what tuner to use. The software automatically detects the multiple tuners and cards. The software also automatically assigns which tuner to use to record what ever program you set it to record. If tuner 1 is recording something, it just moves on to tuner 2, etc. Makes sense, but I thought I would have complications with it. Hahaha.
It also took me a while to figure out that I only needed 1 IR Receiver for the remote controls that come with the cards to work. I was concerned how to control each card w/ the remote w/out interfering with the other card. Obviously, this is resolved by that software explained above. What was tricky was that when I had the 2 IR Receivers pluged in (1 in each card), 1 push of the remote would then create 2 input signals to the software. This lead me to realize I should try taking 1 of them out. That resolved that issue.
I'm still trying to figure out how to use the remote control to the fullest. Right now all I seem to be able to do with it is change channels, control volume, pause, ff, rewind, record & stop. The power button also functions, but if I press it, it shuts down the whole PC system. That's not what I would like it to do. I can't seem to use the remote to do any programming or selections of recorded shows.
The PC has Windows 7 installed. This is also my 1st PC experience with Windows 7. It seems to be working fine. It also has Windows Media Center installed on it. I was going to try setting up the Windows Media Center software, but didn't know if it would create some issues with the WinTV programmed recordings. I'll probably test this out soon.
Another issue that took a couple nights (over night) to figure out was that I needed to disable the sleep mode and auto updates on Windows 7. I figured out the sleep mode after watching tv for about 10 minutes and the screen kept going blank. It took a night of leaving the PC running to find it in the morning on the Windows User Log In screen. This would probably prevent the WinTV from recording the programmed shows, but I'm not sure.
Well, I'm happy with the set up so far. For about the same cost as 2 Tivos with lifetime Tivo subscription I have a new PC that can record 4 channels at once while browsing the web or anything else a PC should be able to do. I think it's a better value. I don't mind having to manually set what I want to record because that's what I planned to do anyway.
Over the Labor Day Weekend, we visited the Honolulu Academy of Arts. I estimate that I haven't been there for perhaps 20 years! I used to go there a lot for elementary school field trips and that's the last I remember of it prior to this last weekend. I have been to the Contemporary Museum of Art several times in recent years, but just never made it to the Honolulu Academy of Arts. I think it must be due to the difficult parking options, but Sunday afternoon is a great option for free street parking directly in front!
It is very nice now. I don't even remember the museum having that many things to see back then. I think when we visited for school fielt trips, the tours are cut short to keep elementary school students interested. I definitely know that the galleries were not so well air-conditioned back then and also did not have automatic sensory lighting that would adjust slightly brighter when you entered the gallery. Very impressive renovations done to the Honolulu Academy of Arts since the last time I've been there! =P
I don't have many photos of the great displays of art because photography isn't allowed in the galleries. Although, photography is allowed in the open courtyard areas.
There are some special collections on display right now.
There was a collection of drawings titled "Goya's Disasters of War" by Francisco Goya. They are a very detailed collection of drawings that appears to be done in pencil. Read the museum's description of this collection here.
The Honolulu Academy of Arts is on the web at http://www.HonoluluAcademy.org and they are located at 900 South Beretania Street, Honolulu, Hawaii 96814 <--Google Map. General admission is $10 and they do have other discounted admission rates. Their normal hours are Tuesday - Saturday: 10a-430p and Sunday 1p-5p. They are closed on Mondays, New Year's Day, 4th of July, Thanksgiving and Christmas according to their guide sheet. The first Wednesday of every month is supposed to be FREE and you are able to visit the shop, The Pavillion Cafe and the library for free too.
We actually went to the Honolulu Academy of Arts to check out The Pavillion Cafe, but it's not open on Sundays. We're considering the location as a potential spot for an upcoming party. Looks good so far, but I haven't asked if they can accomodate our event yet.
We'll try to check out The Pavillion Cafe another time, but they are only open Tuesday - Saturday during lunch (1130a-2p) so it might be difficult!
We decided to purchase the Watts Premier RO-Pure Reverse Osmosis Drinking Water System from Costco since the Brita pitcher takes up so much room in the refrigerator and can barely keep up with the amount of water I drink. The system seems to be the most economical one that is easily available to purchase. The replacement filters are supposed to be easily available also from the website. They don't carry them in the store. Interestingly, I searched Costco.com for this model, but the system doesn't show up, only the replacement filter pack. They also only sell the sediment, pre-carbon & post carbon filters with this pack. They are missing the membrane filter so I'll probably need to buy those somewhere else and the membrane filter is the most expensive! I think I'll ask Costco to also provide that missing membrane filter since the box says, "replacement filters available at costco.com".
Even after the major re-design of my apartment's kitchen, there is still dead spot that isn't very useful. This corner in the photo and the dead spot is under the dish rack. It's the only partially inaccessible corner. I am able to crawl under the sink and stick stuff deep inside and 10 years later crawl back in and discover some ancient artifacts, but basically it's not very useable for much. The sliding racks found at stores that are supposed to make use of these dead zones will not work because the stuff will just end up banging into the sinks drain pipes not to mention having to remove everything stored under the sink area just to slide out that storage slider. I decided this would be a perfect spot for the reverse osmosis system.
Here is a photo of the under-sink area and the difficult to reach void to the right. As you can see, there is still lots of space to put my time capsule of things to be rediscovered when I move out of this apartment, but the reverse osmosis system is already installed. I installed it in the interior of the front panel, the most difficult area to reach. I kept the area that can be seen in this photo open because it's the easiest to access if I store things there.
Here is what it looks like installed. I have the tank as far in the corner as possible and I opted to mount the reverse osmosis filter manifold horizontally. With the filter manifold mounted horizontally like this, all I need to do to replace one is swing the filter out 90 degrees and push the release button. The feature of allowing the filters to swing out 90 degrees is very convenient for me using this odd location.
This is what the filters look like when they are all swung out 90 degrees for replacement. It's a 4 stage filtering system. Stage 1 is the sediment filter and is estimated to require replacing approximately every 6 months. Stage 2 is carbon filter that is also expected to require replacing every 6 month. Stage 3 is the expensive membrane filter that is estimated to require replacement every 2-5 years. The 4th stage is the final carbon filter that should be changed every year. I won't need to be accessing these filters very often.
After the 4 stages of the reverse osmosis filtration process, how does the water taste?? Fine. I can't say I taste any difference between the water filtered by the Brita pitcher or the reverse osmosis system, but I do know there is a difference. I notice a significant difference in the ice cube. The ice cubes made with the Brita pitcher water, on the right, were like normal ice cubes. Softer with lots of white colored ice in it (like air bubbles and stuff). The ice cubes made with the reverse osmosis water, on the left, are crazy hard and clear as ice. The photo of the ice cubes might be difficult to distinguish that the right one has a larger, denser white center in the ice cube than the left, but it is distinguishable in person. You can tell there aren't any (or as much) impurities in the reverse osmosis water ice cubes. Another side affect is that it has made using these silicone ice cube trays very difficult. The reverse osmosis ice cubes are so solid that I can't twist this tray to pop out the ice cubes! I'll have to go back to the solid plastic ice cube trays until get a refrigerator with a built in ice maker.
It's so convenient to have the drinking water available on demand rather than having to wait for the Brita pitcher to filter a half gallon at a time. This system's tank store about 3 gallons of purified water for use on demand, cost about $130 at Costco and took about 30 minutes to install. The most convenient thing about not needing the Brita pitcher anymore is all that extra space in the refrigerator!! =)
I started with a piece of foil and placed some chopped oregano, basil and a couple crushed garlic cloves. I drizzled about a teaspoon of olive oil over these items on the center of the foil and seasoned it with a little salt and pepper. Then I folded the foil into a pouch and roasted it in the toaster oven at 450F for about 30 minutes.
While the garlic and herbs were roasting, I put the dry ingredients into the Kuhn Rikon Vase Whisk. I used about 2 tablespoons of brown sugar, a half teaspoon of dry mustard powder, a dash of salt and pepper.
When the garlic and herbs were nicely roasted, I added it into the vase whisk with as much of the flavored oil on the foil I could get.
I poured in about a third cup of corn based distilled vinegar to comply with my diet restrictions and about two-thirds of a cup of extra virgin olive oil.
Then I put the top on my Kuhn Rikon and turned it to the position that displays the shake icon and shook it up! Then turn the top to the pour icon and drizzle over my salad. That simple!
This Kuhn Rikon Vase Whisk is awesome. It's a bit pricey at about $25, but I'm sure I'll get my money's worth in no time.
It was 25% off the entire store for 3 hours of the morning. I picked up some nice Microplane graters because the one we have looks like this <----. It's the type with multi options. I haven't grated many things in my home kitchen, but I did try to grate a potato last week to make hash browns. What I noticed was that the stroke surface area of one size of the grater is too short!!! I couldn't stand having to take such short strokes on this grater! I guess that's why I've never used one of these in a restaurant kitchen. It never really crossed my mind until now.
I also got a 14" CulinHome Brand Speed Loop magnetic knife holder. I haven't installed it yet so I don't know how well it looks and works for me. This has a lot to do with my granite counters not being installed yet! I don't really know where I'll mount it yet because I know I don't want to drill holes into the wall surfaces that are covered with the granite! I'm still trying to figure this out.
The Kuhn Rikon box is a "Vase Whisk" that I figured I would use to make and store my own dressing since I have to follow my restricted diet. I haven't used it yet, but I'll probably try to fix some dressing over the weekend to test this baby out. I hope it works well because it was pretty costly at around $23 after the discount!! There was another brand that was a little cheaper, but it was so big that I couldn't figure out how it would fit in the refrigerator.
Not pictured is the professional style ice cream scooper that Kelli wanted. It's not pictured because we returned it after finding it at Williams-Sonoma for about $10cheaper!! Kelli used to be a professional ice cream scooper back in the days when her mom owned and operated a Dave's Ice Cream franchise in Aiea. That's why she's so picky about her ice cream scooper. Some other day I should post a photo of all the various ice cream scoopers we've tried and she's rejected. I admit I personally rejected one that I bought from the Marukai 99 Cent Store, but that's because the stupid thing broke the first time I was using it!
The durgol box is the cleaner that is used to clean my espresso machine. Might as well buy it when it's 25% off! :)
I started by chopping up some carrots, yellow onions, green peppers & potatoes. I put the carrots on the bottom of my new steamer topped with the potatoes, then the onions and peppers because I wanted the carrots to cook faster than the onions and peppers. I filled the water to just above the bottom of the steamer so the carrots were wet and I boiled/steamed it for about 20 minutes then removed the strainer from the heat.
While those vegetables were steaming, I cubed some Gala Apples and chopped more onions and green peppers. In my new Martha Stewart oval pot I added several tablespoons of canola oil and lightly browned a fresh chopped garlic clove over medium heat.
Next, I add the diced onions and peppers and get them to caramelize. I also add a few tablespoons of curry powder. I use Tone's brand.
I cook it over the medium heat to break down the onions and peppers while slowly extracting the curry spices flavors. I used to add the flour at this step to create a roux, but since I need to eliminate wheat flour from my diet, I left it out.
While the roux was cooking, I cubed my beef short ribs into nice 1.5 inch chunks.
I moved the roux toward the outer areas of the oval pot and added a little more oil to brown the short ribs. I brought the heat up a little to around a medium high to properly sear and brown the beef. After all the pieces were nicely browned, I added the cubed apples, mixed in the roux and cooked them together a couple more minutes. I also added about a 1/4 teaspoon of fresh lime zest to it. Then, a boxed quart of free range chicken broth was added in. After adding in the chicken broth, I let it simmer covered for about 1.5 hours over low heat to get the short ribs nice and tender.
In the mean time, I still had the water that was used to pre-cook the vegetables boiling in the multi pot. I was reducing it down to concentrate whatever flavors or minerals from cooking the vegetables while making sure not to boil it dry.
After about 1.5 hours of simmering the beef with the curry roux and chicken stock, I added the partially pre-cooked vegetables into the curry, stirred and let simmmer for about another 30-45 minutes. Making sure my vegetables wouldn't be over cooked.
When the vegetable stock was reduced to a couple cups, I added that to the simmering curry.
After simmering for a couple hours, I seasoned to taste with some salt and sugar making sure to season it just slightly less than what I expect it to taste like when served. This is because I'm not serving it immediately. I'm pre-making this and refrigerating some and freezing several portions of it. The flavors will deepen after being allowed to cool and sit at least over night.
After seasoning it, I added corn starch to thicken the curry. This replaces the flour that is left out in the roux stage.
I removed the heat and let the curry cool in the pot for a couple hours. Then I tranferred some to a few Zip Lock Freezer Bags (to be frozen) and some into a container to be refrigerated consumed sooner. Through the week I can just heat over the stove top and serve within minutes.
Delicious! Nothing like the smells of home made curry flowing through your kitchen or your whole condo... making all your neighbors hungry! Hahaha!