Showing posts with label honolulu waikiki condo. Show all posts

Thursday, August 27, 2009

My Kitchen Counters...


www.RickNakama.com granite kitchen countersWell... I planned for a week to be ready for the longly anticipated custom granite counter tops to be installed on the custom cabinets that have been functioning in my kitchen for about a year and a half now with plywood tops. It's definitely been a lengthy journey to this point, but guess what... It's not done yet!

The granite comes on Wednesday and I cleared all the kitchen plywood countertops off so the installer(s) could work on putting some real countertops in. It's a lot of work to clear off the counters! Not to mention figuring out where to set up the espresso machine, microwave & toaster to be operable for a day or so during the install. It's not like I'm in a house with a garage to throw stuff in. I'm stuffed to capacity in this 2 bedroom condo!

So anyway, I find out while they are bringing it in that the installer had to finish another job so he wasn't able to come today!! So now I have to wait until some time next week and set aside another couple days to watch the granite people install the granite. Well, I don't have to watch them, but I at least need to be here for them to come and work. That's not so much of a concern. What is a concern is that I will need to keep all the stuff I moved off the counter tops in it's odd locations...
www.RickNakama.com granite kitchen counterswww.RickNakama.com granite kitchen counters
I'll also have to try to find a street parking again some time next week so that I can keep my parking stalls open for them to park in. That's a real challenge some times. I peer out from the lanais looking down to the streets, trying to spot that stall. If just so happens I see one, I'll run to the elevator and press the down button and wait for what seems like minutes for the elevator to come get me. Then I run into the elevator and press "1" and ride the elevator to the lobby. Then I run to the entry to the garage to get to my car, start it up and zip out to the street just to see that someone has already taken the parking spot!! Oh well that's the condo life in the city... at least there is non-metered street parking around this block!
www.RickNakama.com granite kitchen counterswww.RickNakama.com granite kitchen counters
So here it is... the granite. Happily garnishing my lanai for the next week or so. It enjoys basking in the afternoon sun and gazing at the sunset views. In the morning it watches the Trump Tower Waikiki as it reaches completion. It's anticipating the brilliant Hilton Hawaiian Village's Weekly Friday Night Fireworks Display. It also greets us and says, "how was your day?", while we step into our entry way just like a pet dog. Makes me want to respond... "Move! Get away from the door!" Hahahah...

Oh well... at least I didn't remove the kitchen sink, stove and refrigerator to help speed up the install. I had to move some things back onto the counters, but will not put everything back just to remove them all again next week!

Bookmark and Share


Wednesday, August 12, 2009

Silly Silicone Cup Coasters from Target...


www.RickNakama.com Silly Silicone Cup Coasters from TargetThese silicone coasters come in a set with other colors. Kelli and all her friends always comment that they are "so cute". I'm certain they are very popular and Target must be selling tons of them. Why am I posting this photo??

As you can see, they aren't very functional. They may be cute, but the moisture either on the coaster of from the condensate of the cold drink on the coaster is not retained on the top surface of these coasters. The result is moisture dripping off the coaster and leeching under the silicone coaster. This results in moisture being retained between the coaster and the counter or table top surface. If you are using these on wood finishes, it will leave marks such as these where the coaster was. It's quite disturbing and makes the coaster non-functional. Of course if it was on a glass, Corian, granite, formica, stainless steel or some other solid surface material that is easy to wipe away water stains, just wipe it off. If it's used on a more delicate surface like this wood dining table, you can only hope it will wipe away and not leave a permanent mark.

Luckily there are no permanent markings left... yet! Since these are soooo cute, perhaps they should remain on our table tops for decorative purposes only!

Bookmark and Share


Saturday, May 16, 2009

Stimulating the Economy...


www.RickNakama.com new furnitureA few weeks ago, we decided to help do our share in "stimulating the economy". Everyone knows how badly the auto industry is affected by this situation. So what did we decide to do?? No, we didn't go out and buy a new car. I would think that is a foolish thing to do. We did decide to help support the home furnishing industry.

We took advantage of "Red Tag Clearance Sale" that was going on at the Honolulu Design Center next to the Moana Pacific condominiums. Actually, a couple weeks before that we tried to find stuff at their warehouse sale in Kapolei. That was an experience we'd probably never try again. It was hectic and not really organized. They probably plan it out that way so that people can't really get more than one "deal" during the sale. To make a long story short, we didn't find anything we wanted there.

This dark brown wooden cabinet that I am using for a t.v. stand with extra storage (much needed in a condo) is actually a buffet. It was a clearance item and when I saw it, I immediately pictured it working out for our living room entertainment center. It has three doors that enclose several cubic feet of storage and an open area above it with a built in light which I am using for the components of the entertainment center (dvd player, Nintendo Wii, etc.). What I haven't done yet is make some holes in the back of that area to run the wiring and cables out the back. That's why they are all hanging forward in this photo. The UPS Battery Back Up and my HP Printer will also call the cabinet space home soon. Another modification that I have already done to this buffet is remove the legs. This allows it to sit flush on the floor and also lowers it by about 6 inches creating a perfect height for the t.v.

Another reason why we chose this buffet is that it matches the color of our recently purchased coffee table and side table. Believe it or not, we found the coffee table and side table at Marukai 99 Cent Store. Unfortunately, it wasn't 99 cents, but the pair was just a little over a hundred bucks on sale. We couldn't find anything we really liked at the Honolulu Design Center and we were so excited when we saw these at Marukai. You can't see the side table in this photo, but it's under the lamp to the left, which we purchased from Target in the mix-and-match section of lamps.

Don't pay attention to the curtain (temporary), the white filing cabinet and black refrigerator. Those are only there until we figure out where to arrange them.

The white leather sofa and chaise lounge sectional was actually our first furniture purchase a couple months ago. This is what led to the other purchases.
www.RickNakama.com new dressersThese are the new bedroom furnitures that we just bought. It's a high chest and a wide dresser. The old furnitures we had were too low and narrow so we didn't have enough drawers for all of Kelli's... um our clothes and stuff. With these 2 pieces, we actually still have extra drawers with nothing in them... yet.

What have you done to help support the struggling industries?

Monday, April 27, 2009

Lanai / Balcony / Veranda Gardening


Here's an update on what's going on in my lanai gardening...

After working many years in the Waikiki hotel business, I have learned that not everyone knows what a "lanai" is. I guess it depends on where you are from if you are familiar with the word or not. We here in Hawaii commonly refer to lanais as a lanai where others may call them balconies or verandas.

Anyway, with that out of the way, gardening on a lanai has been a challenge for me. I have always grown things in regular gardens because I grew up in a regular house. These past several years, I have been experimenting with options available to have an efficient and visibly pleasing garden on my lanai.

condo lanai garden tomato www.RickNakama.comThis is one of my latest experiments to add to my lanai. I thought of this after seeing one of those infomercials selling what is called a "Topsy Turvy". (I don't want to post a photo of it here, but I'm sure you can find it if you Google it.) If you don't know what it is, it's an unattractive hanging green tube that allows you to grow a tomato plant out of the bottom. (Just Google it if you don't understand.)

I didn't want to have that unattractive thing hanging on my lanai because not only would it be something I would see, it's also something the neighboring buildings would have to see. I decided to pick up a coconut fiber hanging basket from Target (which recently opened in Honolulu) for about $8.

Then I started some tomato seeds in a tall cup of soil until it grew to about an inch in size. The height of the cup actually was the same height of the dome of the coconut basket if turned upside-down. I used a "venti" size plastic cup from a giant coffee producer.

When the seedling reached about an inch high, I made a hole in the coconut fiber with my finger in the center of the domed area. With the hole large enough to fit the tomato seedling through it without damaging the seedling, I carefully placed the upside-down coconut fiber basket over the cup with the seedling in it. I made sure the seedling peered through the hole in the coconut fibers. Next, I let it grow under the grow lights for about another month. It grew to about 2-3 inches; the size it shows in these photos.

hanging tomato basket www.RickNakama.com TOPICYesterday, I decided it was time to turn my coconut basket "right-side-up" which would make my tomato hang out of the bottom. I took this photo because I was amazed that after only 1 day of hanging upside-down, the tomato plant seems to have turned itself to face upwards again. Very quickly!

hanging tomato basket www.RickNakama.com TOPICOn the top side of the basket I planted some basil, cilantro and oregano. I planted the basil because I read a book one day while I was in Barnes and Nobles that said it was good to plant basil plants with tomato plants. I don't remember the name of the book now, but I'm sure I'll find it again.

hanging tomato basket www.RickNakama.com TOPICI also bought this window planter box from Target and started some salad mix seeds and more basil in it a couple months ago.

Monday, September 29, 2008

Qik Streaming Mobile Videos


This is really neat. I can stream video live from my phone and it automatically publishes it on the web. www.qik.com. If you have a Java enabled phone try it out!

Saturday, September 13, 2008

Kitchen Update


Current Photo... :]

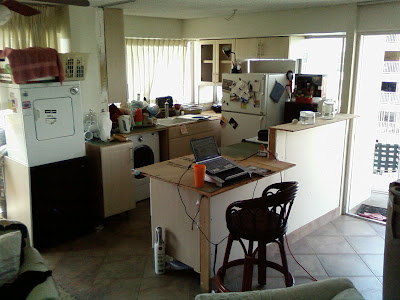
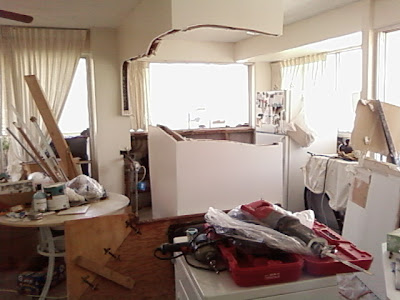
Finally, an update to my blog. It's been a while. I just really haven't been able to sit down and post anything to my blog. Lots of it had to do with the big mess of construction junk taking up most of the place. Anyway, it's not complete, but at least it's a fully operational kitchen. We're still waiting on countertops and a few cabinet pieces, but other than that it works as well as the Death Star did for Vader...

Mid-Demolition (Almost 2 years ago...) :|

Tuesday, November 27, 2007

Chiba-ken Restaurant


www.RickNakama.com Chiba ken restaurant honoluluChiba-ken is one of the recent restaurants to open in Waikiki. Ok, maybe not so recent because it's been a little over a year, but we just got around to trying it. It's conveniently located at 468 Ena Road just off Kalakaua Avenue. The location is great for us because it's about a 5 minute walk from our condo. If you are driving there, I'm not sure where the best place to park would be but I'd look for a street stall.

www.RickNakama.com Chiba ken restaurant honoluluThe ambiance is a mixture of Western (American), Japanese and Hawaii. There are bright colored walls, assorted squash on display, Hawaiian paintings and Japanese geta (wooden shoes) as light diffusers. It's quite a mixture, but all some how pulls together nicely. One thing we felt is that it could use some padding or noise buffers in the restaurant. It was very loud to the point where we didn't have much discussion with each other and I also couldn't hear what the people were saying to me (like eating in a school cafeteria with hundreds of kids, but there are really only maybe 30 or so adults drinking beers!). I think the noise level detered 2 or 3 parties from dining there. They actually sat down at the table beside us for a minute and decided to go somewhere else. I don't usually see people actually leave a restaurant after being seated very often, but it happened at least twice while we were sitting there.
www.RickNakama.com Chiba ken restaurant honoluluwww.RickNakama.com Chiba ken restaurant honoluluwww.RickNakama.com Chiba ken restaurant honolulu
Their menu has a lot of items to choose from. Most Japanese restaurants concentrate on one type of food preparation style (noodles, sushi, sashimi, meals, bowls, etc.), but Chiba-ken has a bit of everything. They specialize in a large sushi selection while also having several teishoku (complete meals), some donburi (bowl dishes), curry and skewered items. The prices range between $2.75-$5 for the sushi, $5-$6 for donburi, $11-$16 for teishoku and several $2-$3 items. It's perfect for people that enjoy some beer with their food. We don't drink beer, but it was still good.

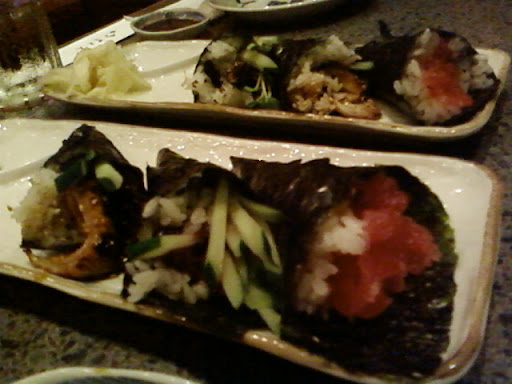
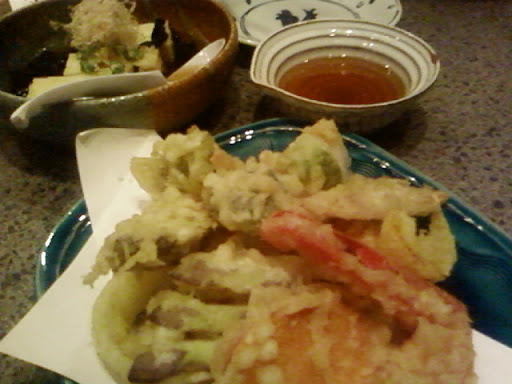
We had 6 temaki sushi (maguro, unagi, sake & ume handrolls), vegetable tenpura, agedashi tofu and hire katsu.

The tenpura and agedashi tofu came out first. The tenpura was crisp with a good variation of vegetables and the agedashi tofu had some konbu (seaweed) in the broth. The broth or sauce that was served with both of those dishes was very light in flavor, almost too light for my tastes. It tasted good, but the agedashi tofu is prepared with firm tofu and I didn't care for it because it was too hard.

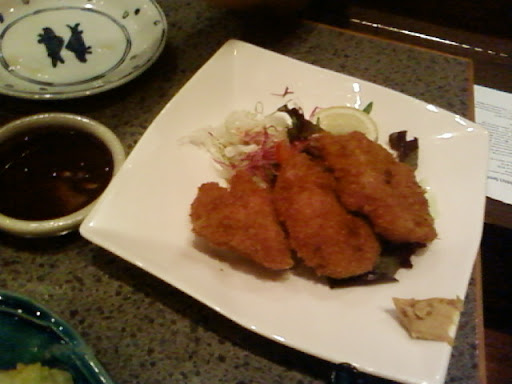
The hire katsu (pork tenderloin fried cutlet) then came out. This is probably the best hire katsu I have ever had! The pork was so moist, soft and juicy. I've had hire katsu at places in Japan and this made more of an impression on me than those. I didn't order the hire katsu at Tokatsu Ginza Bairin yet, but it's probably good there also.

Then the sushi came out. We would have enjoyed the sushi a bit earlier, but I think they held it back because of lack of space on the table. When it arrived the nori was a bit moist and no longer crisp. It still looked good enough for the price. It tasted good.

Lastly, we were waiting for our last item. We had ordered a tsukune (chicken meat ball skewer) at the beginning with the rest of our order. It still didn't arrive. We asked about it and the waitress checked on it. They apparently forgot about it because it wasn't started yet. We were both pretty full so we cancelled it and decided to try it another night.

Finishing up our dinner hot tea was served and our tab was brought over to our table. The tea was served way too hot. If it was a special tea the flavor would have already been ruined because of the over heating. The cup was so hot it was difficult to hold it long enough to take a sip. Anyway, it didn't taste great, just like regular super hot tea.

Overall, I'm very happy this restaurant is here. The food is good, service is ok (they missed 1 item and it's difficult to hear them), very convenient location and good selection of food. We spent about $46 for 2 of us without any drinks. We'll probably be going there more often on Mondays. Why Mondays? Most other Japanese restaurants are closed on Mondays. Our favorite place Michinoku on Kalakaua Ave is closed on Mondays and we actually saw them at Chiba-ken enjoying dinner that night! Even restaurant chefs and their families need to eat out some times...

Chiba-Ken
468 Ena Road
Honolulu, Hawaii 96815
808-941-2800
^Click for Google Search^


Tokatsu Ginza Bairin

Monday, November 26, 2007

Lazy Sunday Morning - Toaster Oven French Toast Casserole


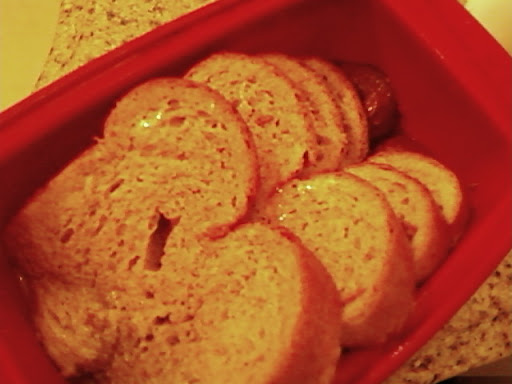
www.RickNakama.com french toast casseroleThe end of a 4 day Thanksgiving weekend is always tough... Trying to fight the rush to the Walmart Black Friday sale left me in absolute disappointment! (They decided to change their proceedures and thousands of people were waiting in a dark line exposed to the elements while last year we were killing time inside the store for hours just waiting for 5am! Tricky buggers!) Anyway after all that exhaustion I woke up on Sunday and had some energy to cook breakfast.
www.RickNakama.com french toast casseroleBut wait... my kitchen still looks like this! The cabinets (2nd try) are expected in this week by the way. In all that Safeway excitement, they lewered us to purchase $25 of groceries to receive a dozen eggs for FREE! Yay! Free Eggs! Then I bring them home last week and start to think, "how will I cook these 12 eggs without a normal kitchen?". Finally I decided I'll whip up a batch of french toast baked in the toaster oven.
www.RickNakama.com french toast casseroleThese are the very basic ingredients that I used. Eggs, milk, cinnamon, vanilla extract, wheat bread and sugar. In fact I didn't even use fresh milk, I used Milkman powdered milk. This method of making french toast in the oven was very interesting to me several years ago. I can't remember where I came across it, but I think it was on Martha Stewart's show. Anyway after I thought of it, it's pretty much the same as bread pudding.

Ingredients:
6 slices wheat bread (mine was from the loaf in my freezer)
4 large grade A eggs **FREE from Safeway!**
4 teaspoons sugar
several drops of vanilla
1/2 teaspoon cinnamon
1/2 cup Milkman milk (prepared) or regular milk is better
Your favorite Butter, fruits and Syrup to serve with french toast.
www.RickNakama.com french toast casserolewww.RickNakama.com french toast casserolewww.RickNakama.com french toast casserole

Combine all ingredients in mixing bowl (except bread!) and mix well. Put slices of bread into a baking dish that can hold the bread and liquid just at the right angle. If it's too big your bread won't stay standing and you'll need more bread and mixture. Pour mixture over bread and make sure all the bread is moist from soaking the mixture. All the liquid should be absorbed by the bread. Preheat (toaster) oven to 350F and bake french toast for about 30-35 minutes. There should be a golden brown top and the insides should still be a little moist. Slice into portions, server with your favorite fruit, butter syrup and breakfast meats. A hot cup of home roasted coffee goes really well with this also!

I've been reading a lot of bread baking recipes and blog posts recently. I really want to bake some bread!! All I have is this toaster oven. Has anyone tried to bake a loaf or bun of fresh yeast bread in a toaster oven? I'm anxious to bake bread and I think I'm going to have to try to bake some before my kitchen oven is back in action!!

Thursday, November 15, 2007

Hydroponic Salad Mix Seedlings...


www.RickNakama.com hydroponics
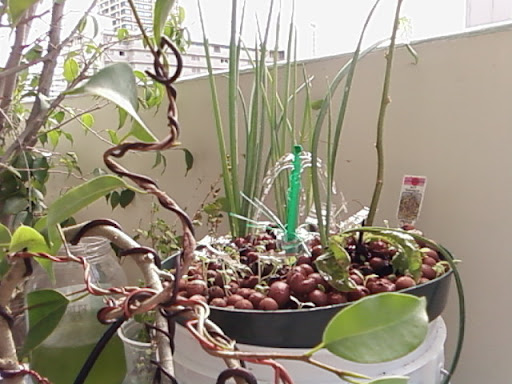
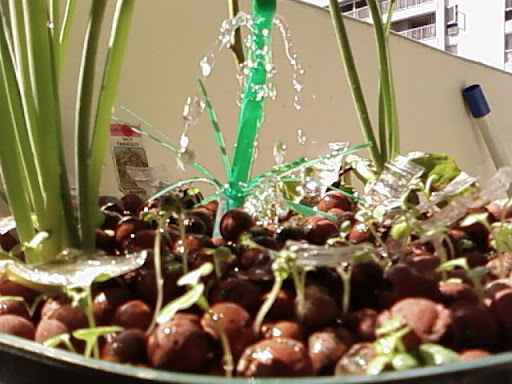
www.RickNakama.com hydroponicsIt's been about a week since I revamped my condominium vegetable garden. This is a picture from today. I added on a homemade water diffuser sponsored partially by Starbucks Coffee's recognizable green straw the labor and engineering was provided by me. The mixed greens and other seedlings seem to be sprouting very well. Most are about 2 inches in length or more. A few have began showing their 1st true leaf sprouts.
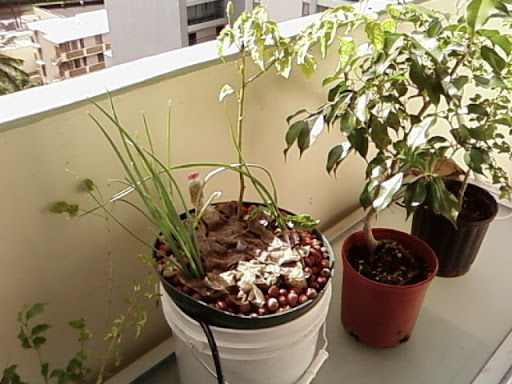
This water sprinkling design I made is not the most effecient for several reasons. 1st of all it allows the water to evaporate faster and there is more splashing, another reason is that it wets the above ground part of the plant and if you have a plant that prefers to only have moist roots (like some flowers) this will not be good. I set this system up like this because it just looks neat when the water is pumping. It's the "Garden Water Feature" of my condo.

PS- In the larger picture above, you can see a part of Kelli's 2nd bonsai tree in the foreground. The original look of that ficus tree is in my previous hyrdoponics post from last week. We're loving the "Art of Bonsai" classes!

Thursday, November 8, 2007

Hydroponics Simplified...


www.RickNakama.com hydroponics
About a year or so ago, I became interested in hydroponics. I've always enjoyed growing my fresh herbs and vegetables since I was a child. Living in a condo, working with soil is a major issue. I decided to try hydroponics. Actually, I decided to go with a more complex aquaponics set-up at first.
www.RickNakama.com hydroponicsHere is what my aquaponics looked like when I started it. I won't show a picture of how it ended... trust me it was not good. The problem I think was that my small guppies and the 1 big cichlid in the tank were not producing enough nutrients for the types of plants I tried to grow (eggplant, cucumber, green onions, chili peppers, bell peppers & lettuce). You can probably tell how well that went by what plants are left in my new set-up (chili pepper, green onions, 1 lettuce, 1 clove of garlic). Besides having a hard time getting the nutrients for the plants using the aquaponics method, the water would immediately turn dark green from the sun. I could have reduced this by using a black or non-translucent container for the tank, but I wanted to be able to see the fish occasionally. I didn't like the green water because eventually it was so green you couldn't see the fish anyway! It was finally time for version 2.0 of my condo lanai vegetable garden.
www.RickNakama.com hydroponicsI had purchased these things back in March, but haven't had a chance to set it up. It actually only took about 10 minutes to set up, but cleaning up the old system is what was a big job. I put the guppies and the cichlid in my indoor aquarium for now and I'll see how that goes.

These are the parts I used for this super simple set-up. Total cost approx. $50.
-bucket (white)
-cheap plastic planter (green)
-cheapest garden fountain water pump I could find ($19)
-silicone hose to fit pump outlet & length from bottom of bucket to top of planter
-expanded clay pellets (grow medium)
-outlet timer (capable of 30 minute cycles)
-Water Soluble Miracle-Gro 8oz trial size "All Purpose Plant Food" (24-8-16)

The cost to set-up might seem higher than buying a bag of potting soil, but I have a good feeling that in the long run it will be more effecient. I have started my version 2.0 system with the small bucket and planter just as a trial basis. If It works out, all I would need to do is spend money on a larger bucket and planter that can have more growing surface. I might also need a little more silicone hose and connectors to spread the water evenly and more expanded clay pellets which I already have a big bag of. The location of my plants are on my balcony facing afternoon sun so I don't feel the need for any grow lights right now.

Assembly:
-Place water pump into bucket.
-Pass silicone hose through bottom of planter drain hole (should have several holes; if it's not big enough or there aren't any you'll need to make some).
-Planter should be able to rest on the rim of the bucket or you will need a spacer under the planter to hold it to the desired height.
-Fill bucket with enough water to submerse the pump and be at about the level of the bottom of the planter.
-Hold end (opposite end of the side at the pump) of silicone hose up to center & top of planter.
-Fill planter with expanded clay pellets or whatever medium you choose leaving room for plants and more medium at surface.
-Plants' roots should be washed free of soil and gently placed in the medium while adding more medium to support the plants.
-Set timer to turn on for 30 minutes and off for 30 minutes all day long (this can be adjusted to maintain proper moisture for your area and plants).
-Plug pump into timer and check to see that it cycles off and on.
-While pump is running, make sure pressure is low enough so it doesn't shoot the water out of your planter & also check that water is being evenly distributed around the planter. I used cut up pieces of a drinking water bottle to direct flow of water outward.
-Dilute Miracle-Gro (instructions 1 Tblspn./Gallon of water is for normal use). Since I'm just starting this version now, I am starting with about 1/4 teaspoon/Gallon of water. **note: a gallon of water doesn't fit in my bucket. The bucket is only filled to about 4 inches from the bottom. Save the solution or make less if you don't need a gallon.

I sprinkled some new lettuce mix seeds, spinach seeds and mizuna seeds on the top so I placed a paper towel on the top to keep it moist so the seeds can germinate. We'll see how this version works. Hopefully better than my aquaponics.

Wednesday, November 7, 2007

Home Coffee Roast - Disaster!


www.RickNakama.com Sweet Maria's Sweet Maria's Sumatra Classic MandhelingHome Coffee Roast - Disaster!

It's been pouring rain for the past few days here and we've been having winds from the south. Here, in Honolulu, it means humidity! Today it's not raining, but it's very hot and humid. According to weather.com Waikiki's humidity is 69%. I checked this after the disaster.

Normally, I chill the pan and have it ready to put the roasted beans on and get it over to the fan to cool as quickly as possible. I also put one of those freezer ice bags under a cooling rack and rest the pan on it as the fan blows. This usually draws the heat from the pan pretty quickly and makes sure the beans don't sit and bake. I noticed something unusual today. It was so humid, the pan formed condensation while the beans were cooling!! This was bad! Moisture is not something that should be going into your fresh roasted Sumatra Classic Mandheling beans!! I better work on my mesh colander & vacuum cooling set-up. There's just no space while my kitchen renovation is in progress.

I roasted this small batch to a "city" roast just after the 1st cracks were heard. I wanted to try a lighter roast because I read another foodie blog about lighter roasts (Lisabeeen Homeroasted Coffee)<-click. I usually roast to a darker Full City+ or Vienna roast. Because of my concern about the moisture ruining the fresh roast, I decided to test a cup right away even though you are supposed to let the bean rest a few days. It tasted ok. Looked really light after grinding and even the coffee looked light. I could taste the difference from the darker roasts. I don't know for sure how it will taste after the bean rests though, but due to the moisture contamination I'll have to re-do this roast.

Related Links: Guatemala Fraijanes- Finca Aqua Tibia to Vienna, Sulawesi Grade One Toraja & Rwanda Butare Bourbon, Mexico FTO Oaxaca Pluma - "At City+" & Sumatra Classic Mandheling - "Full City+", Guatemala Fraijanes, Brasil FTO Poco Fundo, 1st Home Roasting Post, Zimbabwe AA -Dandoni Estate Full City + Roast, CoffeeGeek.com, Sweet Maria's Coffee, Sweet Maria's Roasting Guide.

Thursday, November 1, 2007

Halloween SPAM! Waikiki...


www.RickNakama.com I've been so busy I am falling behind posting all the photos and blogs I plan to post. Since Halloween is such a seasonal event, I figured I better put it (or at least some) of it up right away.
Here is my cousin, Aya, and her boyfriend, Yuichi. Aya was dressed up as an angel. It's her 1st Halloween since moving to Hawaii. Yuichi was wearing a SPAM can hat. Funny thing about it is many people pointed it out, "hey SPAM!", etc. The thing is about half of the people who commented about the SPAM hat actually called it "SPAM Musubi!" For some reason a lot of the locals referred to the SPAM can as SPAM Musubi. I thought that was interesting. Goes to show you how popular SPAM Musubis are in Hawaii.

Now if you really want to see a nice SPAM Musubi, check out Kat's apetizing SPAM Musubi post <-click here. Or my Mini Honey-Strawberry Glazed SPAM Musubi.

I'll post up some other things from Halloween a little later.

Saturday, October 27, 2007

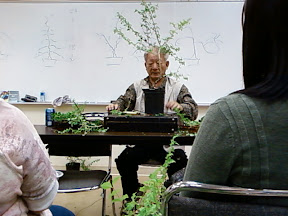
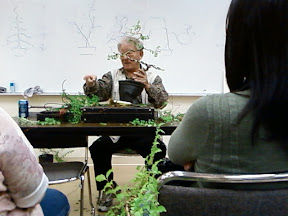
"Art of Bonsai" with Master Walter Liew (Sessions 4 & 5)


www.RickNakama.com bonsai classArt of Bonsai
- Wiring and Form...


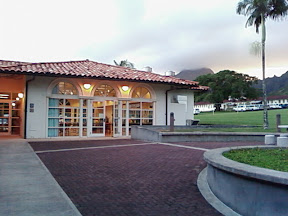
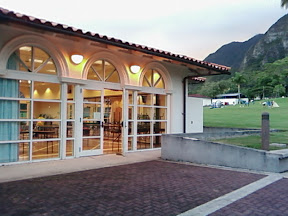
This is a summary of the last 2 classes. In these last 2 classes we observed the mistakes that we all made when wiring our trees. Then we observed the techniques Master Liew used to decide what style of bonsai is best suited for the tree and finally how to style them. I started the night with a practice shot of the building at twilight. Something that Realtors always try to capture. Anyway...
www.RickNakama.com bonsai classI think this Windward Community College Campus is really nice. Look at the design of the buildings and the Ko'olau Mountain Range in the back.
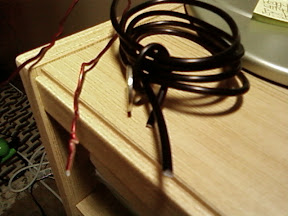
The wire used for bonsai is a special wire sold in nursery or garden stores that specialize in bonsai equipment and tools. It's an aluminum wire that is available in several different gauges, but usually there are only 2 main sizes that you need for working on these types and sizes of bonsai. The picture of the 2 wires below has a nickel (5 cents) profile in it so you can relate to the thickness of the wire. The wire is soft enough to bend and form around the tree trunk and branches. It's best to have it wrapping at a 45 degree angle. The thicker wire is for the trunk and larger branches and the thin wire is for your smaller limbs.
www.RickNakama.com bonsai classwww.RickNakama.com bonsai classwww.RickNakama.com bonsai class
After securing, with wire, each branch that you will be using in your style, you then cut off the branches that are not used. Sometimes you may reserve an extra branch at a spot that you think one branch may turn out more artistic than the other. Later on, you will pick the nicer branch. Every inch of the tree trunk and its branches must have a curve. If there is any part of the tree that is more than 1 inch of straight branch, it's not done according to bonsai style.
www.RickNakama.com bonsai classI think this tree has style. It's one of Master Liew's show pieces. It is an art so really, he says, "as long as it is beautiful, it can be art". I'm sure some "straight" trees might look beautiful, but I think when it's in contrast with a styled tree most artisans will choose the styled tree.
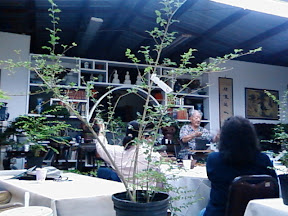
www.RickNakama.com bonsai classwww.RickNakama.com bonsai class
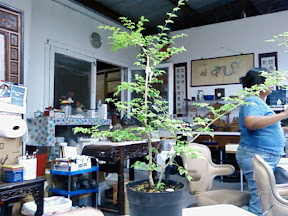
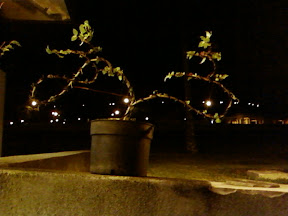
Above are our Hackberry Trees before styling...

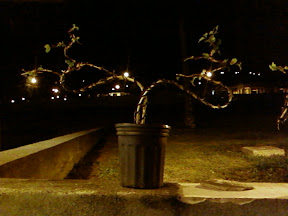
Below are our Hackberrry Trees after styling...
www.RickNakama.com bonsai classwww.RickNakama.com bonsai class
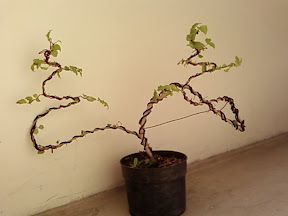
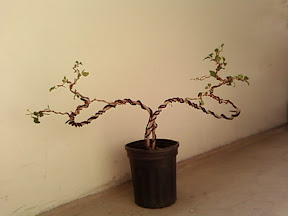
I took those just outside of the classroom. I forgot to take the picture in the lighted classroom, but we needed to make sure that if any branches bend in transport, we know how it's supposed to look. Our trees both had twin trunks. He decided that both our trees were best suited for the style he called "Lovers" or "Father & Son" or "Husband & Wife" etc. This style is actually 2 "Literati" style trunks with "Model" tops. As you can see, although they are the same style, they are different. Kelli's one has that infinity looking 8 in it. Master Liew says it's supposed to represent me doing everything I can to make her happy!!! That might be good for her, but is that good for ME?? =P He always has a story or theme to go with the tree style and that is part of the reason why his bonsai are so popular amongst the art and culture enthusiasts. He is afterall a Ph.D. The story of Kelli's tree style also has some traits known as the Phoenix and the Dragon style. Of course, he's quite a salesman...

Below are the trees in daylight after about 5 days from the night of becoming styled. No new leaves or branches yet, but it's surviving the manipulation.
www.RickNakama.com bonsai classwww.RickNakama.com bonsai class
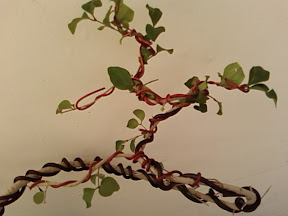
www.RickNakama.com bonsai classHere's a close up of the wiring and the bends in the "Model" styled section of the bonsai. Now we have to go practice buying our own trees. Part of the lesson is being able to choose the right tree to create the style of bonsai that you want. I want to try and find a tree to make a nice "Full Cascade". We're loving this class and recommend anyone who has the slightest interest to take it!
Related Links: Master Walter Liew Googled, Google Maps of Dragon Garden, Yellowpages Dragon Garden Listing, Full Size Photo Album, My Bonsai Posts.

Monday, October 22, 2007

Briax soaps from New Zealand...


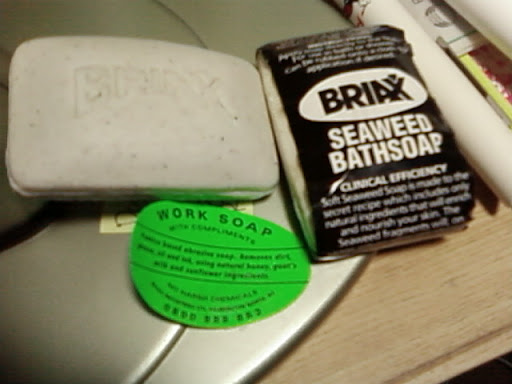
www.RickNakama.com Briax soaps from New Zealand Briax Soaps...

I met a nice and interesting couple from New Zealand at the Outrigger Reef Hotel the other night. They gave me a couple of bars of this Briax soap. 1 bar is labeled with the green sticker as a "work soap" and the 2nd is wrapped in the black labeled "bath soap". They both smell very good and contain special natural items that condition your skin as well as help cleanse it.

The Work Soap is pumice based and also has honey, goat's milk and sunflower. It worked really well when I used it to clean up the thin-set from my hands after I worked on my kitchen floor tiles.

The Seaweed Bathsoap is a "secret recipe" of seaweed and other natural ingredients. You can see and feel the small particles of seaweed in the bar. Of course, it smells great and it says it also promotes blood circulation and improves skin texture.

Briax Industries can be found on the web here <-click. He also races classic cars which is why we got even more involved in conversation. His car racing website is here <-click.

Wednesday, October 17, 2007

Senor Frogs in Waikiki...


www.RickNakama.com senor frogs waikikiSaturday night, after the Blue Angels Air Show, we walked to Senor Frogs. It's on the 3rd floor of the newly renovated area of Royal Hawaiian Shopping Center. We arrived there about 8pm and received a pager that would call us when our table became available. We were seated in about 15 minutes and the hostess' estimation was 20 minutes.
www.RickNakama.com senor frogs waikikiWe had a seat out on the veranda over looking Kalakaua Avenue. It was a nice area to be seated. The interior seating is probably where most of the excitement is. It was still very dark so my pictures aren't that great. The atomosphere is very fun and exciting. People were singing on stage (karaoke) and there was professional entertainment as well.
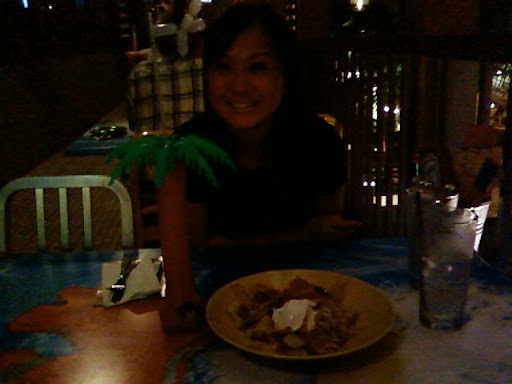
www.RickNakama.com senor frogs waikikiwww.RickNakama.com senor frogs waikikiwww.RickNakama.com senor frogs waikiki
The food is a Mexican style food. It's not the greatest Mexican food, but it's ok. Again, I think it's mostly for the party atmosphere here. On the left is our souvenir "palm tree" 20 ounce margarita cup. We had a strawberry and mango margarita that tasted pretty good. Also in that picture is a free nachos that we found a coupon for in one of the books out in the mall area. The center is my "Mexican Fiesta" plate that had a flank steak and some chicken taquitos and to the right is Kelli's steak tacos.

It's all about the drinks and the party atmosphere! This is not a place to go for a nice, quiet dinner. We thought the food was OK at best and the drink was good. If we do go to Senor Frogs again, it would probably be for someone's party or to entertain some visitors. The cost was about $40 for the 2 of us.

If you want good Mexican food, I would suggest some other places like Jose's, Los Chapporos or that place we went to in Kaneohe. I will eventually get to posting on those places.
Related Links: Google Maps of Royal Hawaiian Shopping Center, Senor Frogs in Yellpages.com.


日本語by Google Translate.
Related Posts Widget for Blogs by LinkWithin
© 2007 RickNakama.com
Use of this site indicates your agreement to our Terms of Service.